Resizing photos using Irfanview
I love this program, it is easy to use and allows you to resize in complete batches.
So I am including instructions here on how to resize using Irfanview.
You can download a free version of this program at: http://www.irfanview.com/
Please remember that for tombstone photos once you have resized the photo the names and dates on the headstone should be clear and easy to read, otherwise the photo is of little use to anyone.
(Before starting to resize please make a folder to put your original photos in, then within that folder create a subfolder called new or temp to put the new resized photos in, this will prevent overwriting your original images.)
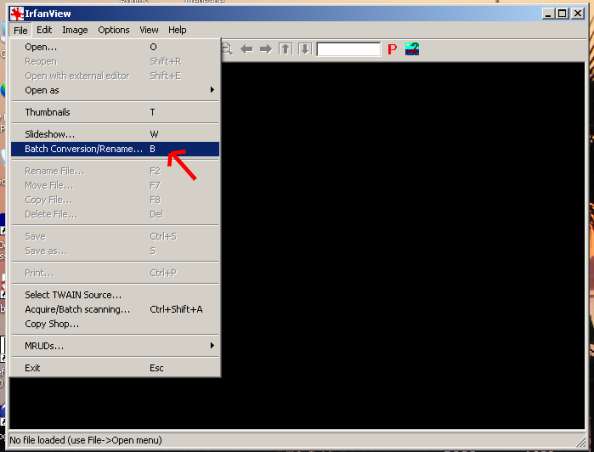
Open Irfanview and at the top left click on the word File, then choose Batch Conversion/Rename. see below:
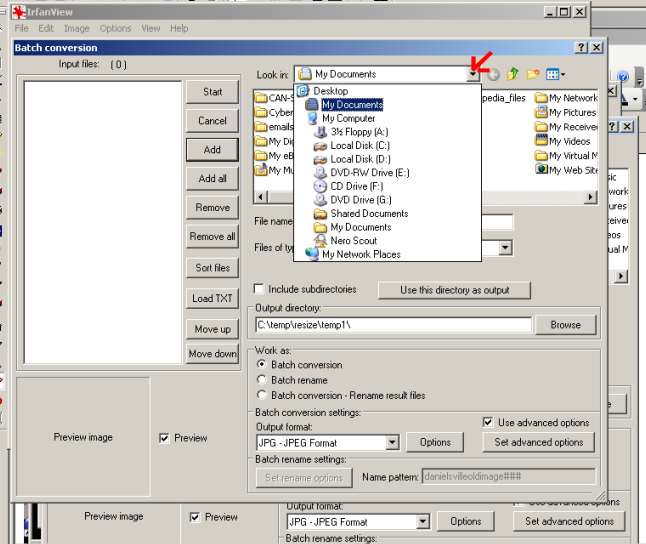
In the window that comes up, at the top right where it says "Look In:" click the drop down menu and browse to the folder where you have put your photos.
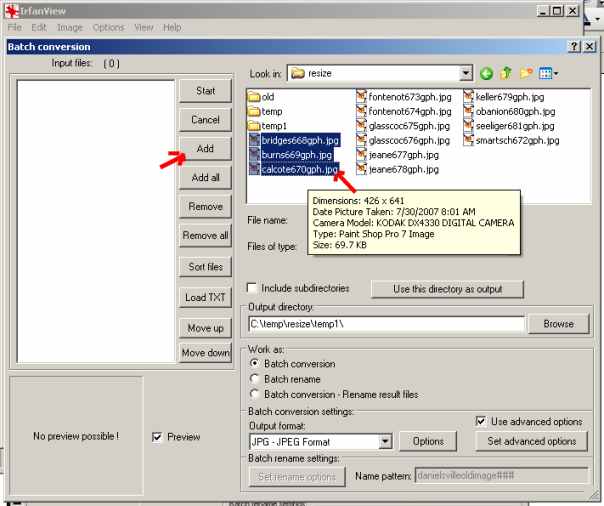
Once you have browsed to your photos select the photos that you want to resize, you can select one, or you can select several by holding the ctrl button and selecting one at a time until the ones you want are all highlighted or you can hold down the shift key and select the first and last ones to highlight them all, once highlighted click on the Add button on the left column, that should show the list of your photos in the left window
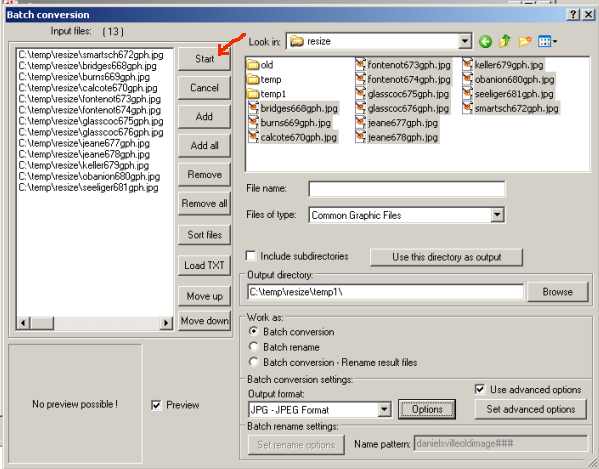
Now you want to go down to the right center where it says Output Directory and you want to browse to the folder where your photos are at and you want to then select that temp or new sub directory that you created (this will prevent overwriting original photos).

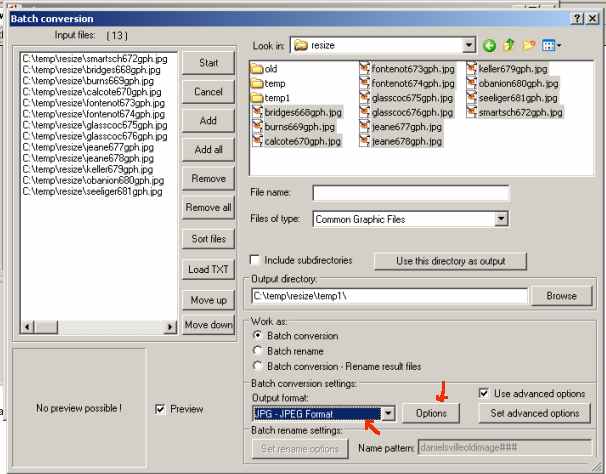
Next in the Work As: field below you want to put a tick where it says Batch Conversion. put a check where it says use advanced options and then click on the button that says Set Advanced Options.you will get a box that says Settings for all images. On the left put a tick next to the box that says Resize and under that put a tick where it says "Set a new size as percentage of original" Start out by first trying this with 70% put a tick next to the box that says Preserve aspect ratio (proportional) and a tick next to where it says Use filesample function (better quality) then click ok at the bottom of the box. This resizing window is what changes the picture in size as in inches/pixels.

Back in the Batch conversion box at the bottom where it says "Output Format" make sure that JPG-JPEG is selected, if not then click the drop down menu and select JPG-JPEG then click the Options button next to that which will give you a JPG/gif Save options window.
In that JPEG/GIF save options window you will see a Save Quality slider bar with left being the lowest quality and right being the highest quality. In your first trial run try setting the quality to 50 or 75, this resizing option changes the compression levels as in byte sizes not in inches. I often resize tombstone photos using a compression level as low as 25% and still get clear images if the original is good quality initially.
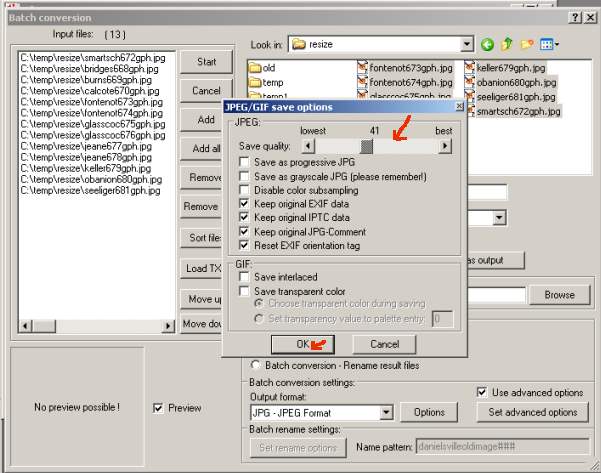
Once you have set your slider bar then click the ok button at the bottom. This will put you back at the original resize window. You can then go to the top left and click on the Start button.
You will see it go down the list and give you a batch conversion done window.
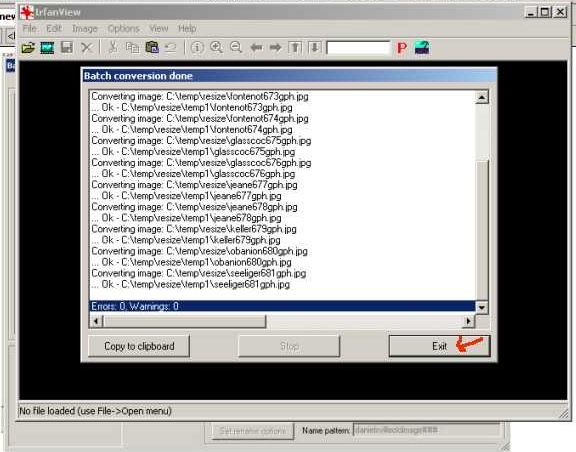
Click on Exit.
Now go to your temp directory and check the photos that have been resized, can they still be clearly read?? are they under 300kb in size??
If they are not clear or if they are still too large then delete the ones you've just resized, start back from the beginning with your originals and adjust the jpg resizing options, maybe trying 50% of original size and adjust the compression options on the slider bar down to 20 or 40
This can be practiced a few times until you are clear with what is happening and feel comfortable that you have the best looking photo at the smallest size possible. Remember we are putting photos online so that researchers can get names and dates from tombstones, they do need to be clearly read but they do not need to be high photographic quality. The higher quality, the more disk space that is required to hold these photos and since our server space is donated to us , let's please use good judgement in keeping file sizes to a minimum.